TABLE OF CONTENTS
Summary
Notification groups can be used to set up different groups of people who need to be notified about certain concerns. For example, you could set a notification group for the year 7 year group.
There is a default notification group for all DSL users. This will not be visible in the notification group admin area, but will be a drop-down option for users to select when raising a concern.
Note: By adding users to a notification group, you will be giving them the equivalent to DSL level access to the concerns sent to it. If a year group is associated, they will also be able to access the profiles for that year group.
How to set up a notification group
You will need Account Admin and DSL permissions to set up notification groups.
- Go to the Admin tab
- Click Users
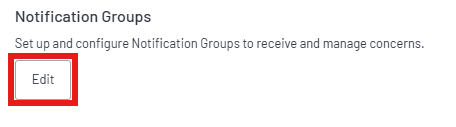
- Click edit under Notification Groups
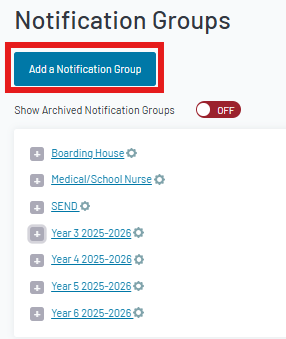
4. Click Add New Notification Group. A form will appear on the right of the screen.
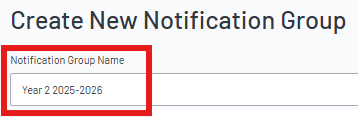
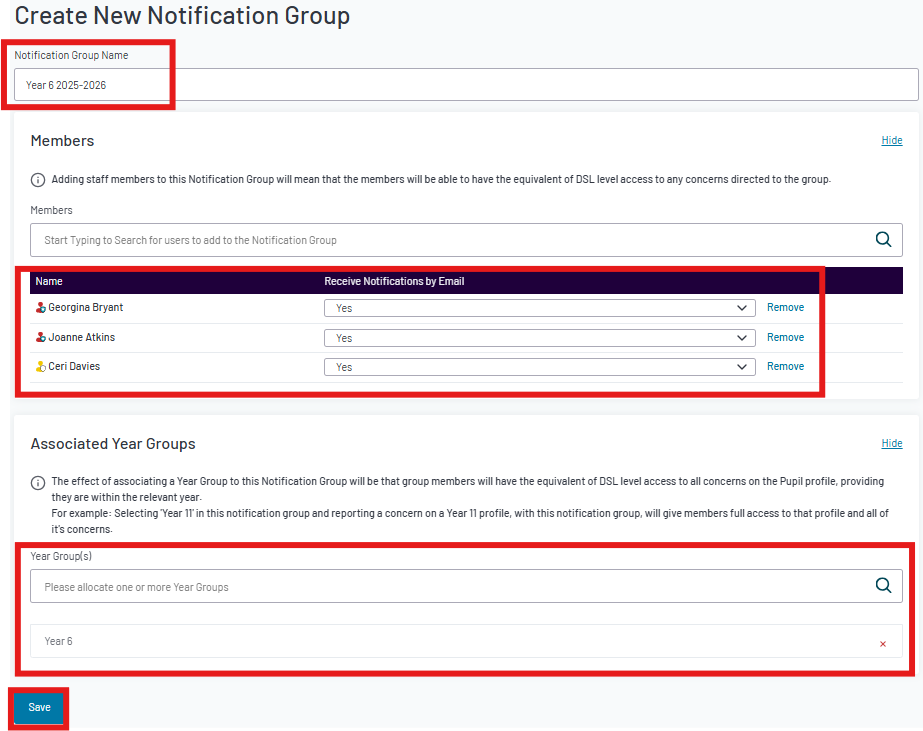
5. Add a name for the notification group.
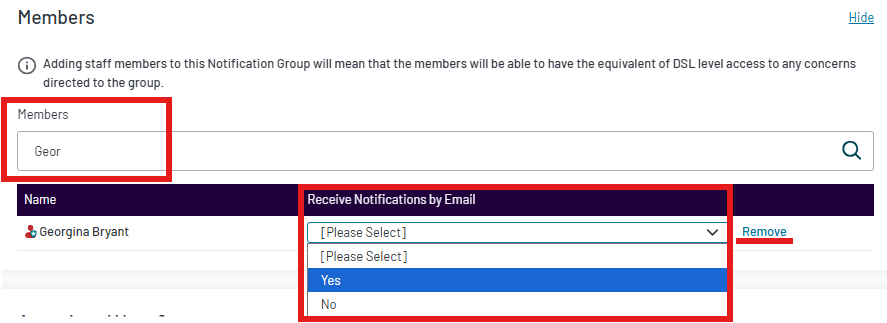
6. Add members to the group. Only DSL or Trusted User levels can be added.
Note: The email notification setting will need to be set to yes for one or more users. If it isn't, the notifications will be directed to the default DSL group.
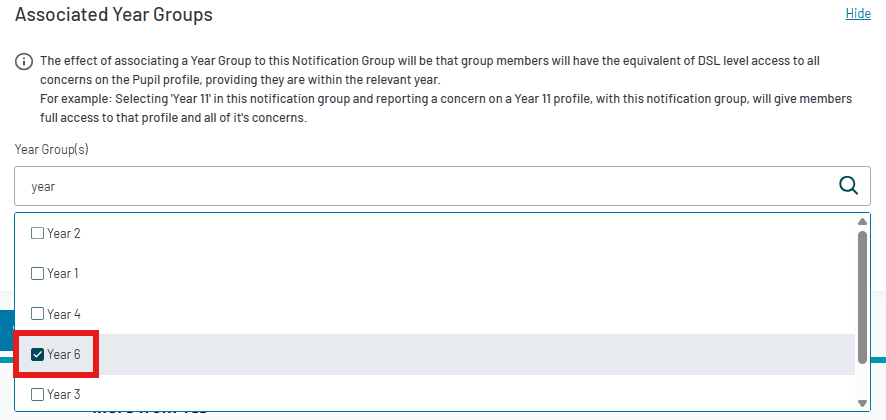
7. Optional: A year group can be associated to the notification group. This will give the group members access to the concerns and profiles associated to this year group.
8. Once the form is complete, click Save to create your notification group.
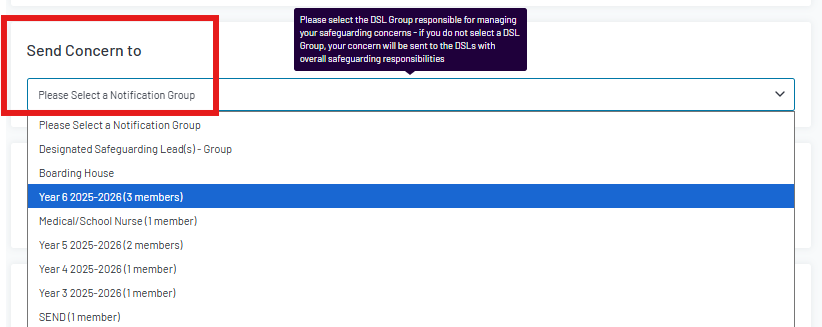
9. When you have added notification groups, they will populate the drop-down list in the report a concern form.
Editing a notification group
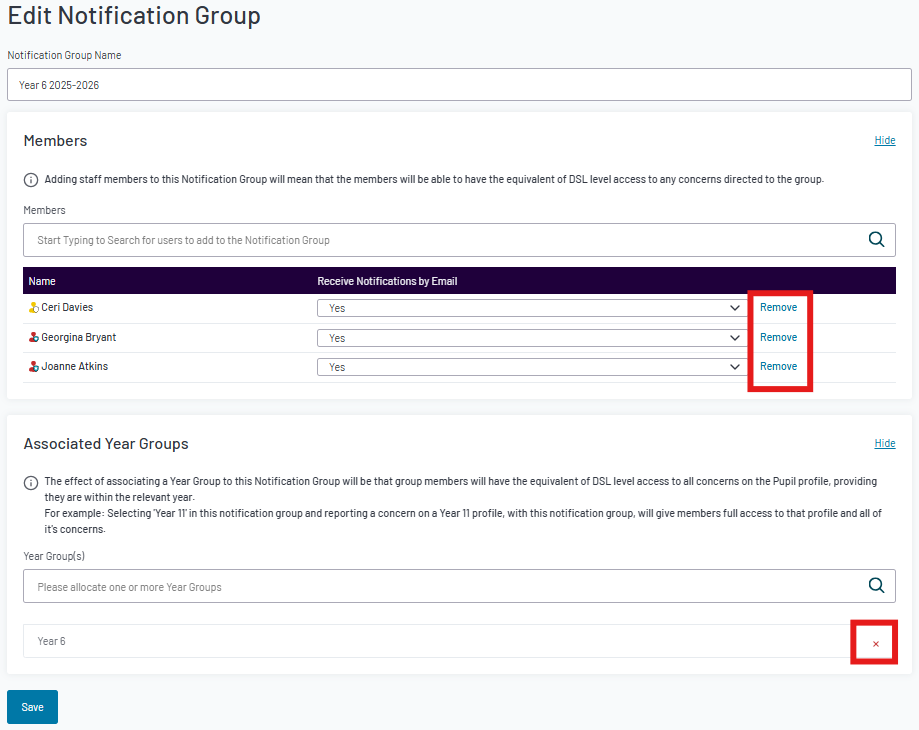
To edit a notification group, click on the group name on the left. This will open the edit form for you to make amendments.
- Members can be removed by clicking Remove.
- Year groups can be disassociated by clicking the x
Archiving a notification group
Notification groups can be archived when they are no longer needed.
Note: Best practice for archiving a notification group is to follow the steps to edit first, remove all members and associated year groups to fully dismantle the group. This will make sure any access to concerns and profiles that may be linked to the group, is revoked successfully.
This is recommended at the end of each academic year.
Once users and year groups have been removed, click the cog/gear icon next to the group name and select Archive.
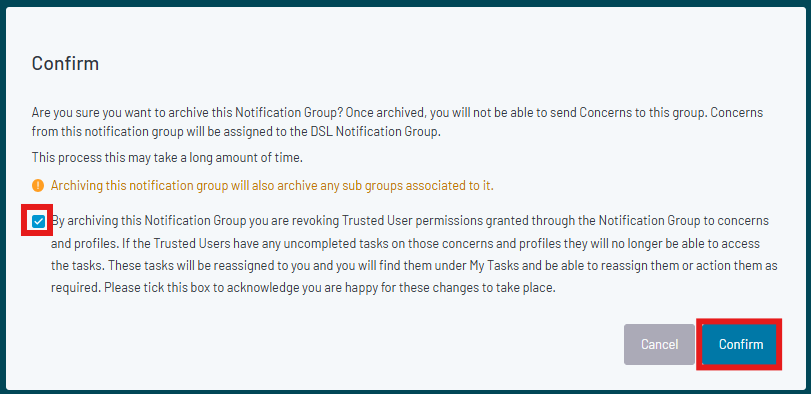
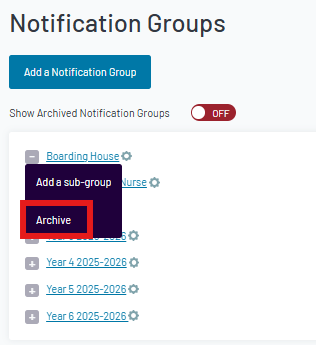 The pop-up will confirm the consequences of archiving the group. You will need to tick the box and Confirm.
Was this article helpful?
That’s Great!
Thank you for your feedback
Sorry! We couldn't be helpful
Thank you for your feedback
Feedback sent
We appreciate your effort and will try to fix the article